win7系统添加IPX协议的操作方法
时间:2021-09-22 12:33:27 来源:www.cnomit.cn 作者:佚名 浏览次数:
大家对电脑都爱不释手,但偶尔会碰见对win7系统添加IPX协议进行设置的问题,相信大家都是第一次面对win7系统添加IPX协议的问题,那么怎样快速对win7系统添加IPX协议的设置方法非常简单,只需要1、因为Windows 7 操作系统不自带IPX协议,需要在Windows XP 等操作系统中找到相关协议相关的系统文件,保存到相应的路劲之中,再添加协议才可以。提取文件有多种方式,可以在网上下载,百度网盘分享的路径是: 全部文件 > 维护电脑 > 系统文件 > Windows 7 > 【IPX协议】.rar 2、如果有备份Windows XP 操作系统镜像,也可以使用镜像浏览器提取文件,首先找到:netnwlnk.inf 、netnwlnk.PNF文件,在Windows XP 操作系统中保存的路径是(这是一台XP和Windows 7 共享C盘的镜像,否则系统可能会在其他分区)C:Windowsinf文件夹下。提取之后,将其保存到Windows 7 操作系统中相同的路径之下 C:Windowsinf 文件夹中即可。的顺序来就搞定了,现在我们就一同详细的学习一下win7系统添加IPX协议具体的设置方法:

方法/步骤
1、因为Windows 7 操作系统不自带IPX协议,需要在Windows XP 等操作系统中找到相关协议相关的系统文件,保存到相应的路劲之中,再添加协议才可以。提取文件有多种方式,可以在网上下载,百度网盘分享的路径是:
全部文件 > 维护电脑 > 系统文件 > Windows 7 > 【IPX协议】.rar

2、如果有备份Windows XP 操作系统镜像,也可以使用镜像浏览器提取文件,首先找到:netnwlnk.inf 、netnwlnk.PNF文件,在Windows XP 操作系统中保存的路径是(这是一台XP和Windows 7 共享C盘的镜像,否则系统可能会在其他分区)C:Windowsinf文件夹下。提取之后,将其保存到Windows 7 操作系统中相同的路径之下 C:Windowsinf 文件夹中即可。

3、安全起见,粘贴进入Windows 7 系统文件夹,可能还需要权限→继续。

4、再将Windows XP 操作系统中的C:WindowsSystem32路径下的三个动态链文件:wshisn.dll 、rtipxmib.dll 、nwprovau.dll 提取拷贝到Windows 7 相同的目录之下C:WindowsSystem32(如果系统盘不在C盘就更换分区)。

5、同样,复制、粘贴进入C:WindowsSystem32文件夹也需要权限→继续。

6
再将Windows XP 操作系统 C:WindowsSystem32Drivers 路径下的:
nwlnkipx.sys 、nwlnkspx.sys、nwlnknb.sys 三个系统文件提取到到Windows 7 操作系统下相应的路径下即可:C:WindowsSystem32Drivers 。

7、C:WindowsSystem32Drivers 也是系统文件夹,粘贴外来文件也会有权限的问题→继续。

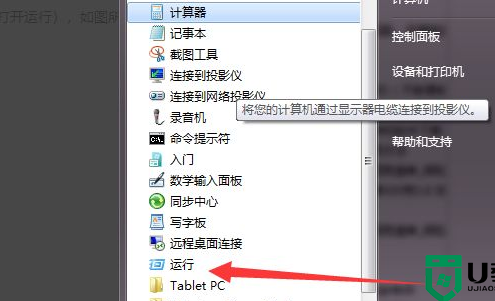
8、然后,开始→运行→输入:ncpa.cpl 按回车键打开网络连接→右键本地连接→属性。

9、点击 本地连接 属性→网络→安装→协议

10、文件正确,点开就有IPX协议了,点击之后→确定即可安装,重启电脑生效。

11、注意:32位Windows 7 和64位Windows 7 的系统文件是不一样的需要注意。
先复制文件到相应的文件夹内,再在本地连接的属性页面中安装IPX/spx协议即可。安装完IPX协议重启系统之后,就可以玩星际争霸,cs.红警等需要IPX/spx协议支持局域网对战的游戏了。

以上就是Win7系统中如何添加IPX协议方法介绍,大家看明白了吗?希望能对大家有所帮助!